Microsoft Entra ID
PolicyArc uses Microsoft Entra ID as a pass-through identity provider: when a user signs in, PolicyArc redirects them through Microsoft's OAuth flow and accepts the resulting OIDC identity. PolicyArc never sees or stores their Microsoft password.
To wire this up, you'll register an app in Microsoft Entra (formerly Azure AD), capture its Application (client) ID, Directory (tenant) ID, and a client secret, and hand them to PolicyArc. If you plan to use the Microsoft connectors (OneDrive, Teams), you'll also grant the app Microsoft Graph API permissions.
- A Microsoft Entra tenant (your organization's Azure / M365 directory).
- Permission to register applications and grant API permissions in that tenant. Admin rights are required for the Graph API permissions later in the walkthrough.
- The PolicyArc admin portal open in another tab.
Step 1 — Pick Microsoft in the Add Identity Provider screen
In the Admin Portal, go to Identity → Add identity provider and pick Microsoft from the provider list.
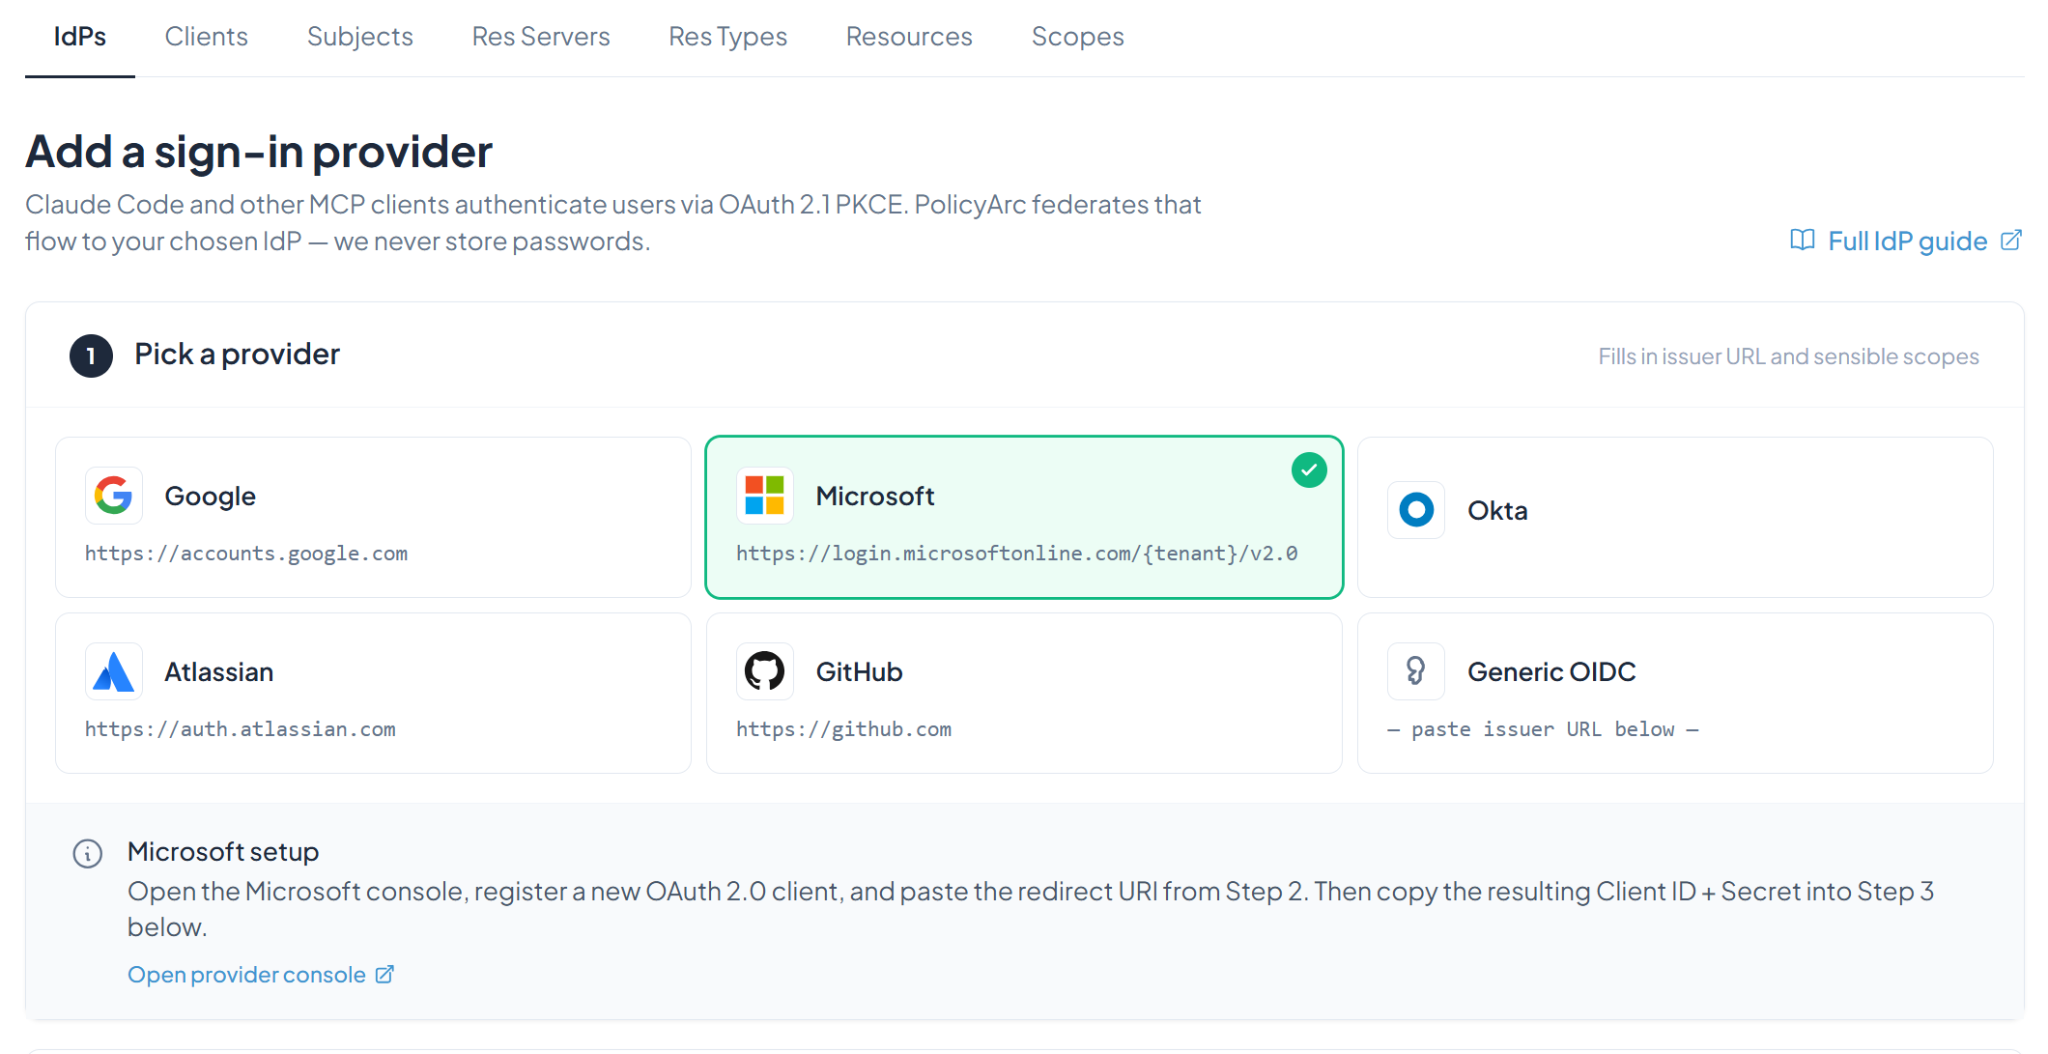
Keep this tab open — you'll come back to it after you register the app in Entra.
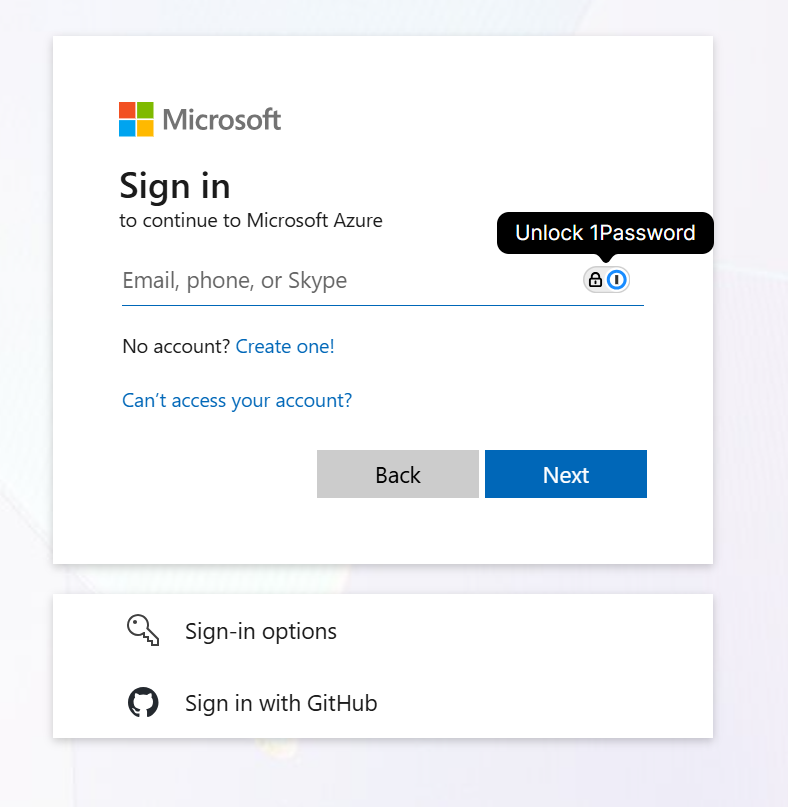
Step 2 — Open the Microsoft provider console
Click Open provider console. Microsoft will ask you to sign in.
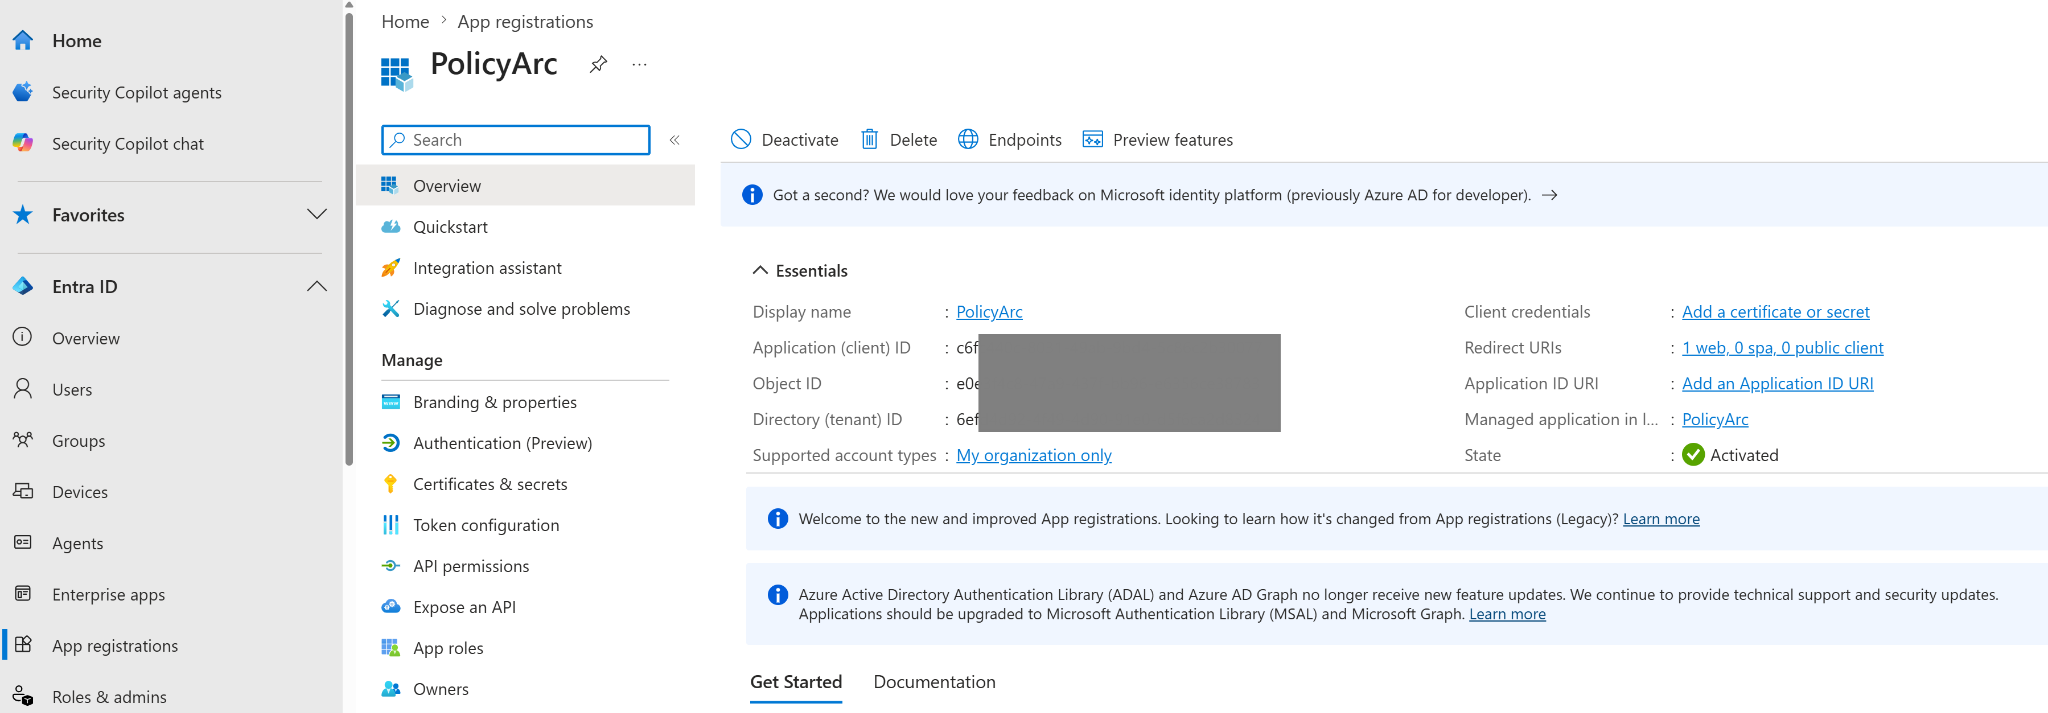
After you authenticate, you'll land on the Microsoft Entra admin center. In the left navigation, expand Entra ID → App registrations.

Step 3 — Register a new application
Click + New registration. Fill in:
- Name — for example,
PolicyArc. - Supported account types — pick the option that fits your org (single-tenant is the most common).
- Redirect URI — pick Web and paste the callback URL from the PolicyArc tab you left open in Step 1. Each PolicyArc environment uses a different port, so copy the exact value PolicyArc shows you.

Click Register.
Step 4 — Capture the Client ID and Tenant ID
Microsoft drops you on the app's Overview page. Note these two values — you'll paste them into PolicyArc:
- Application (client) ID → maps to PolicyArc's Client ID.
- Directory (tenant) ID → maps to PolicyArc's Tenant ID.
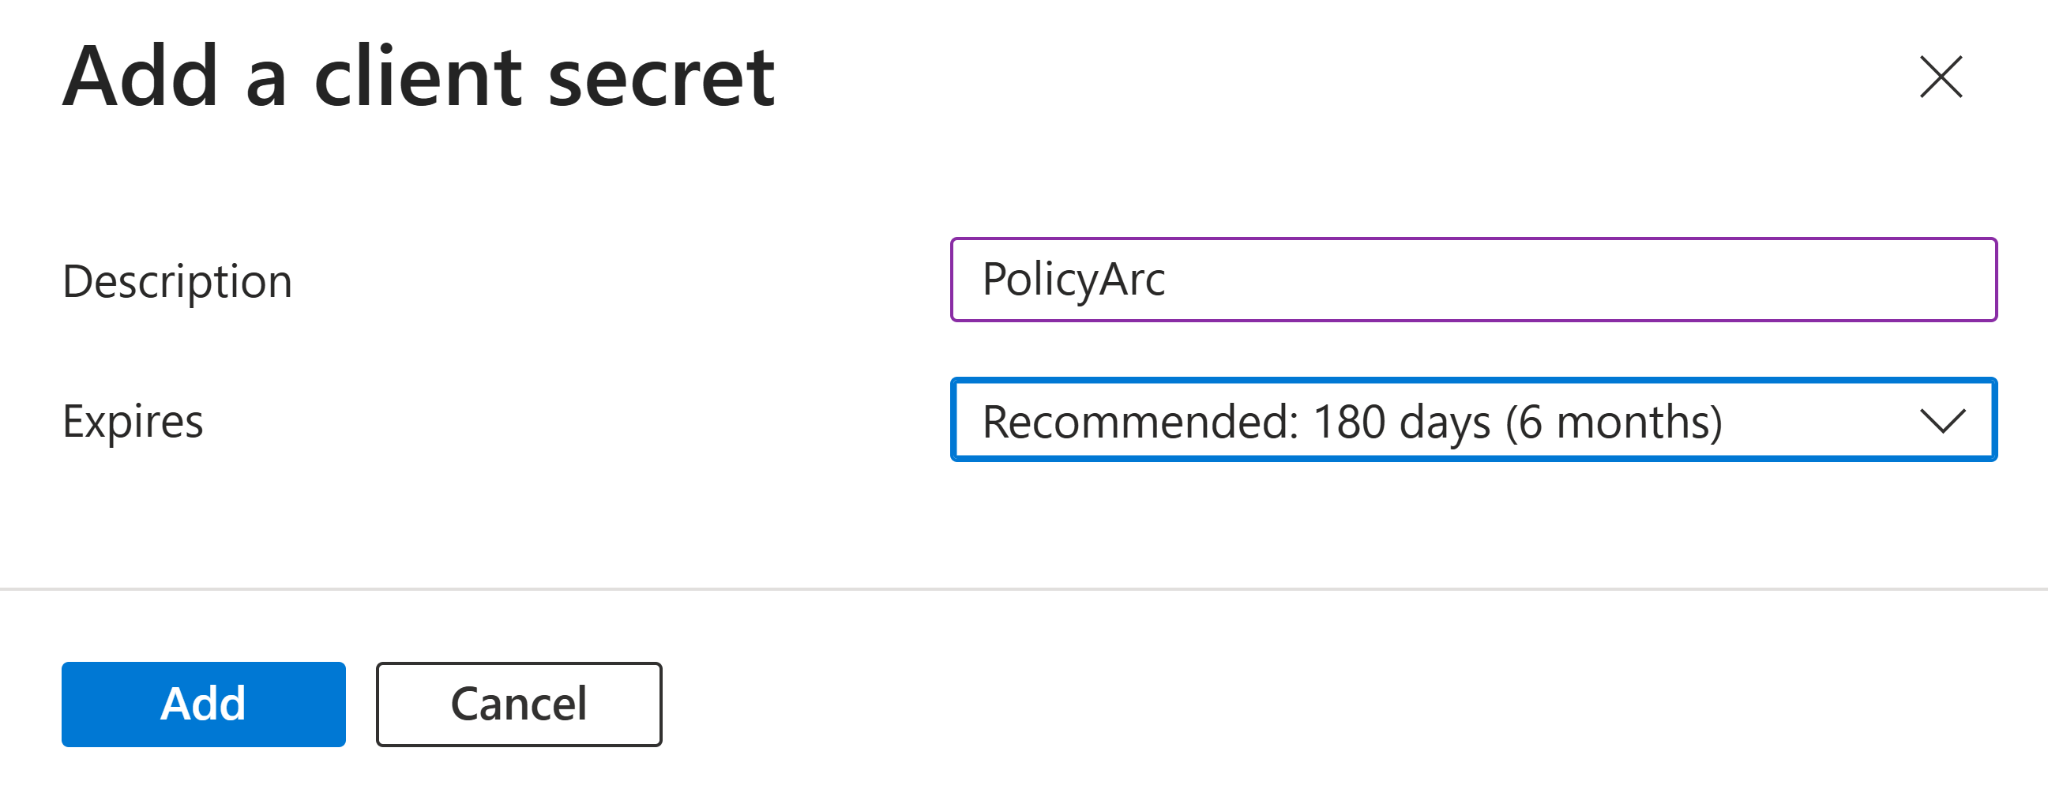
Step 5 — Create a client secret
In the left navigation, click Certificates & secrets.
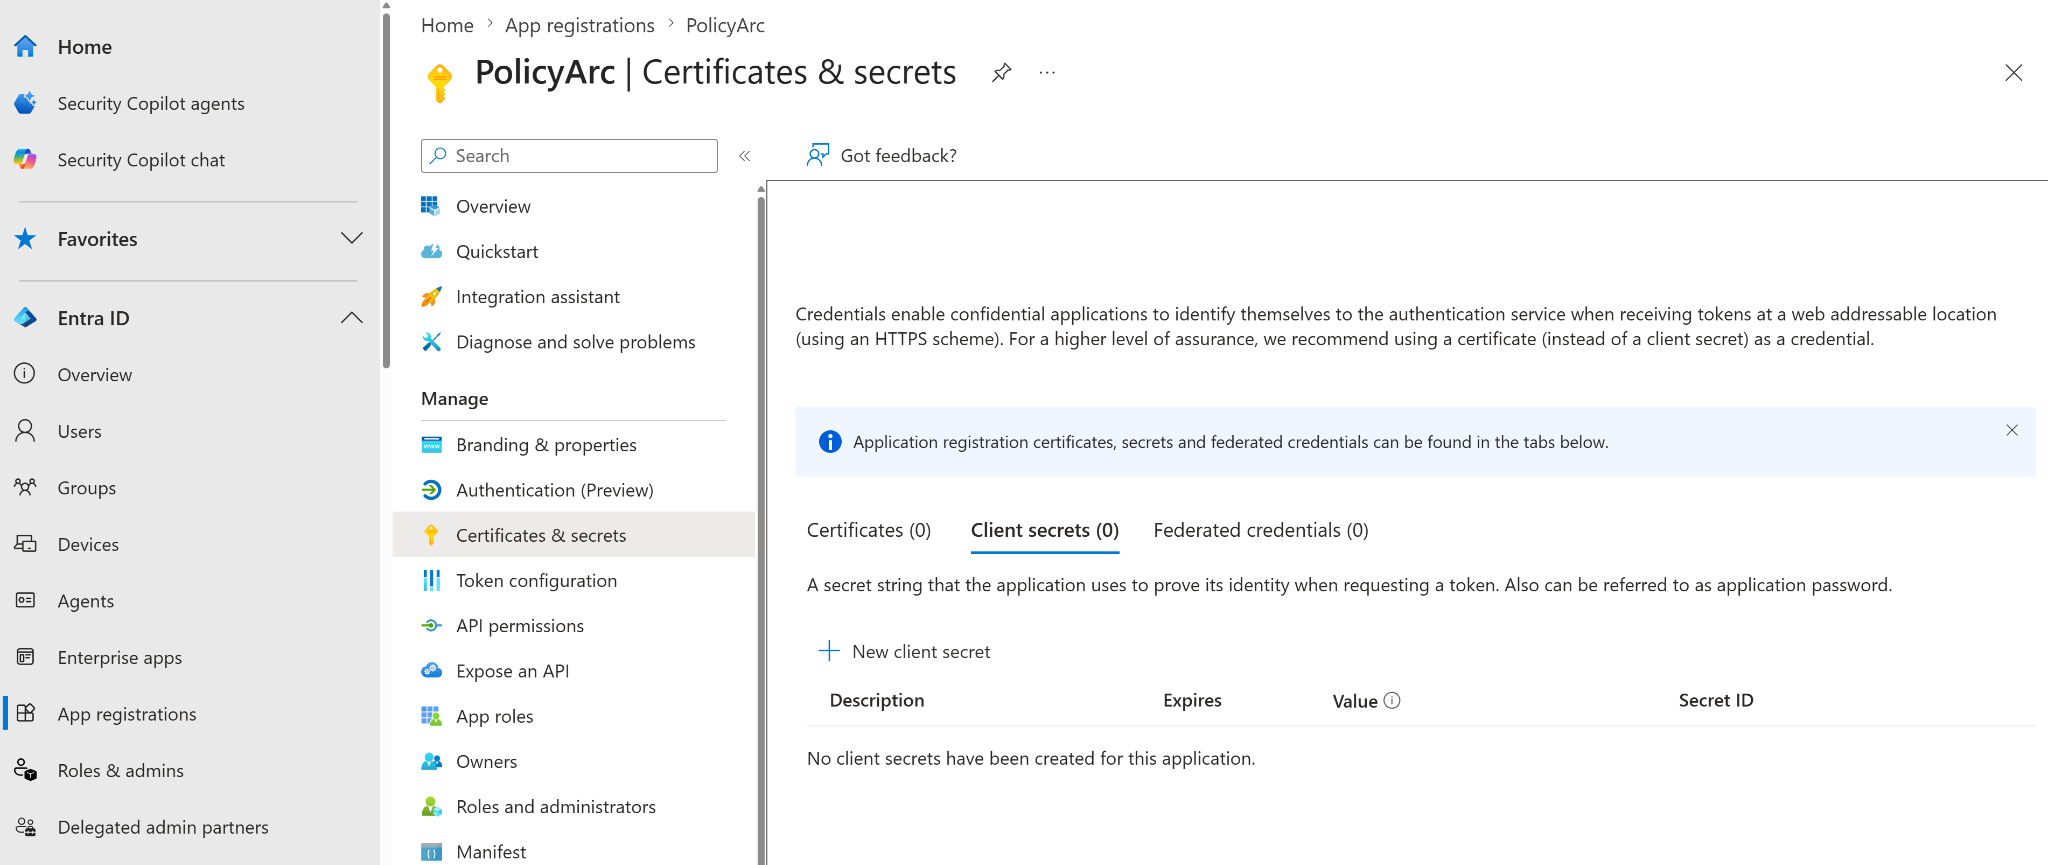
Click + New client secret, give it a description (for example, PolicyArc), pick an expiration that fits your rotation policy, and click Add.
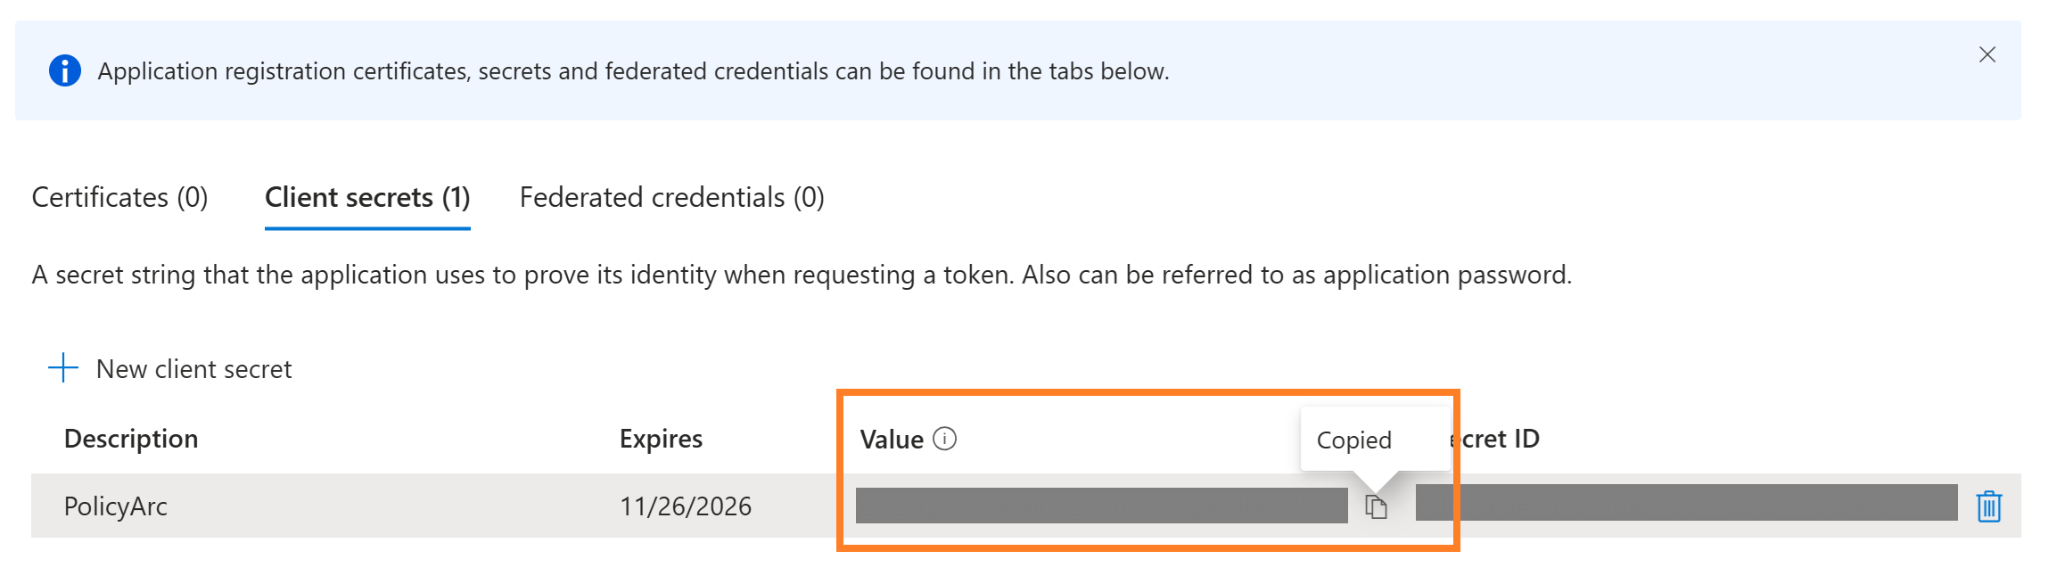
The Value column is the actual client secret. Microsoft only shows it once — as soon as you navigate away from this page it's gone for good. Copy it now and paste it into PolicyArc before doing anything else.
The Secret ID column is not the secret. Don't confuse the two.
Step 6 — Finish the IDP in PolicyArc
Switch back to the PolicyArc Admin Portal tab and paste:
- Tenant ID — PolicyArc uses this to build the issuer URL (
https://login.microsoftonline.com/{tenant}/v2.0) and fetch the discovery document automatically. When the tenant is valid, you'll see "Issuer resolved. Endpoints discovered — review and save." - Client ID — from Step 4.
- Client secret — the secret value from Step 5.
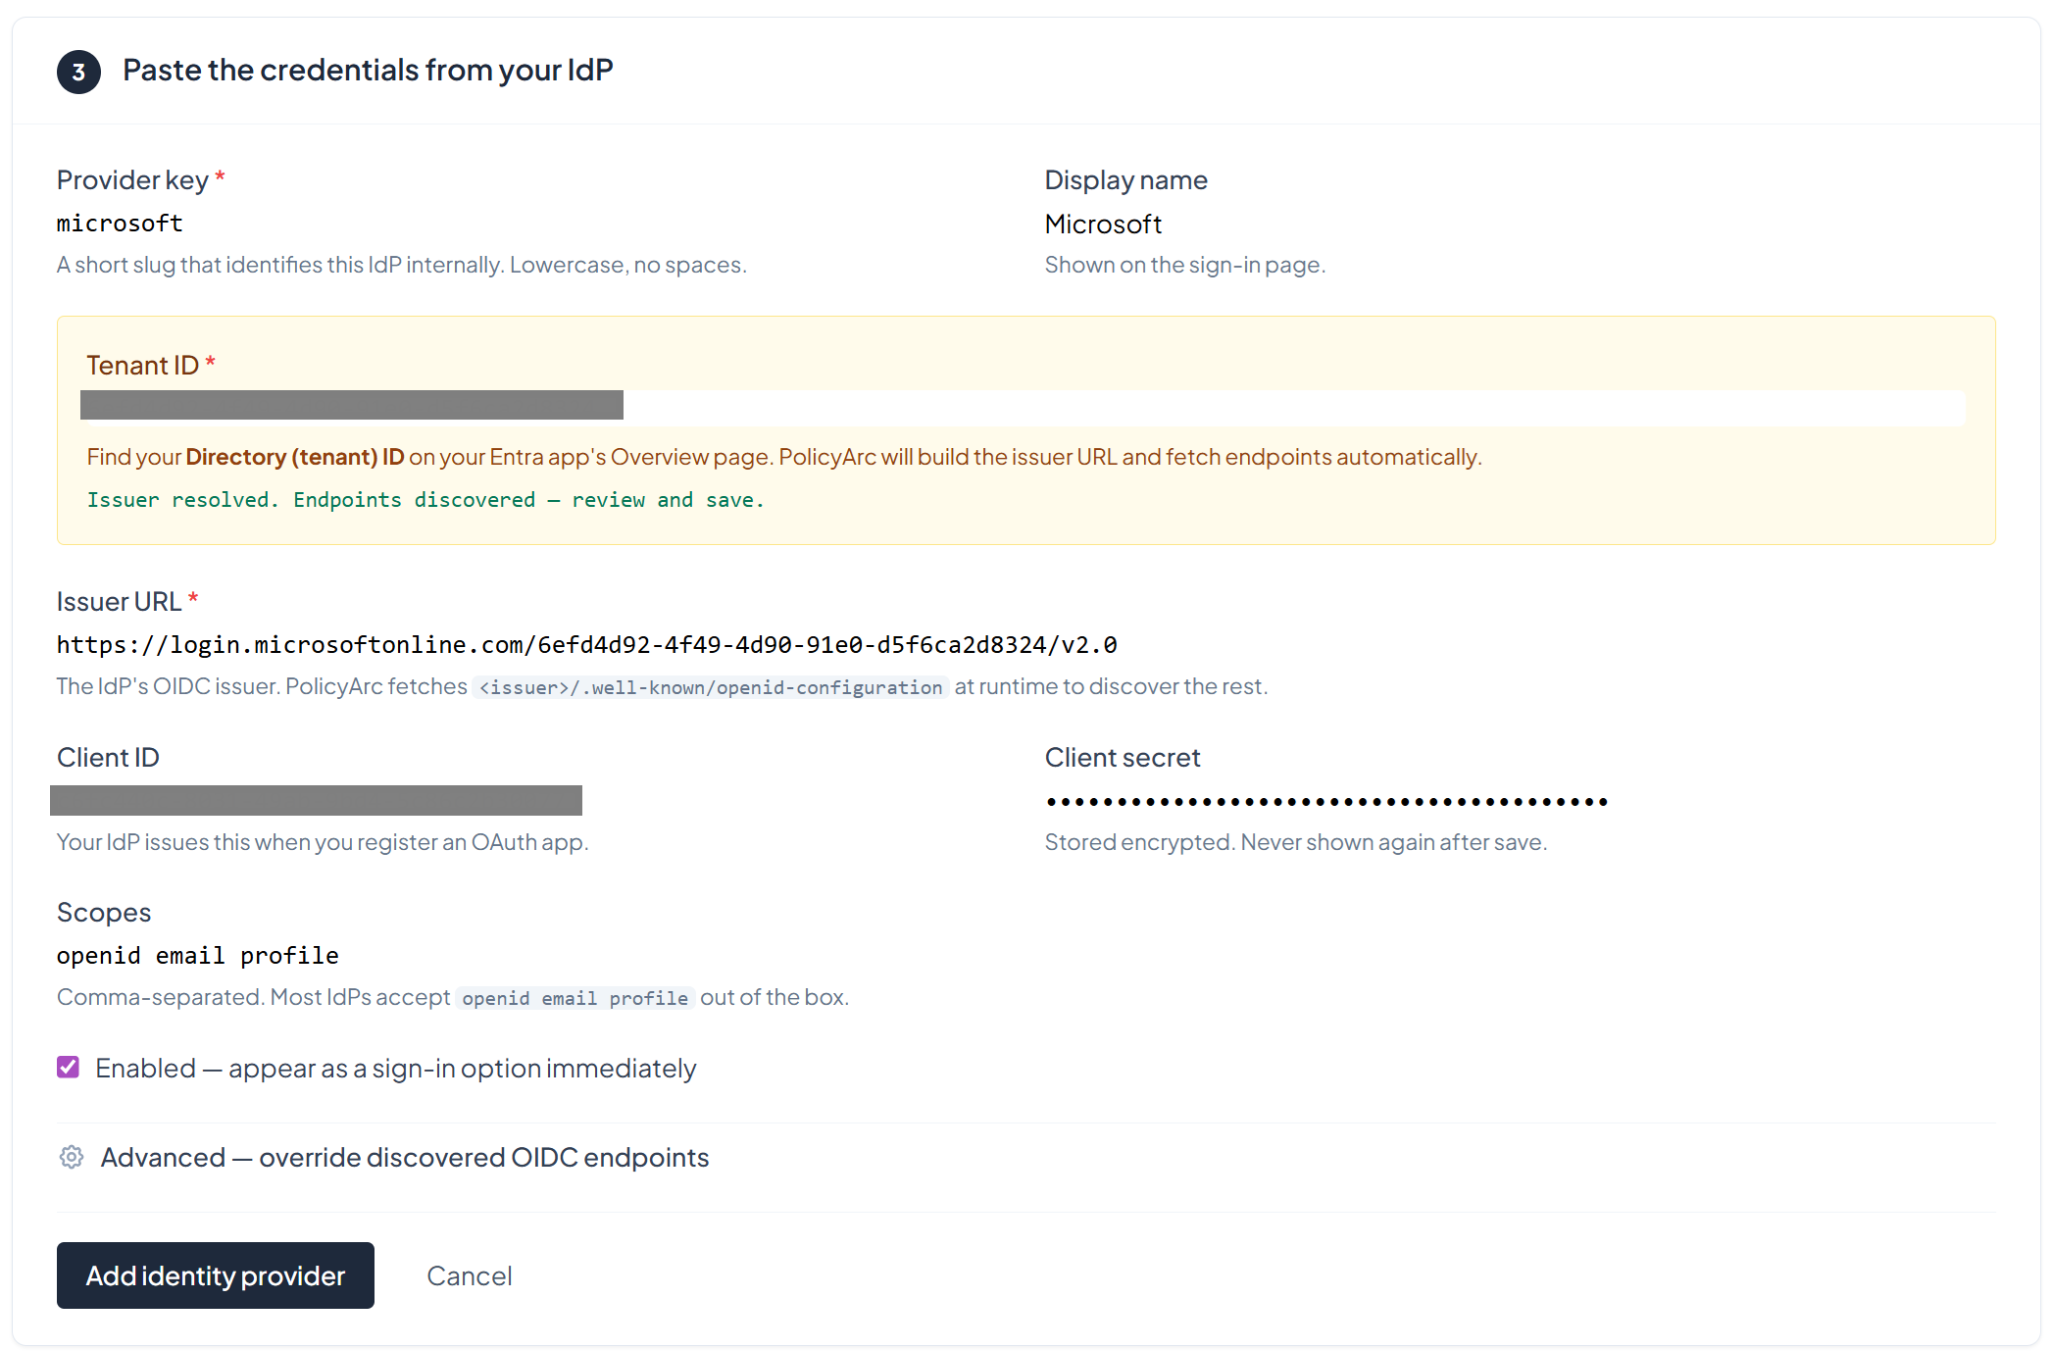
Click Add identity provider. You'll land back on the environment overview with Microsoft connected and ready for sign-in.
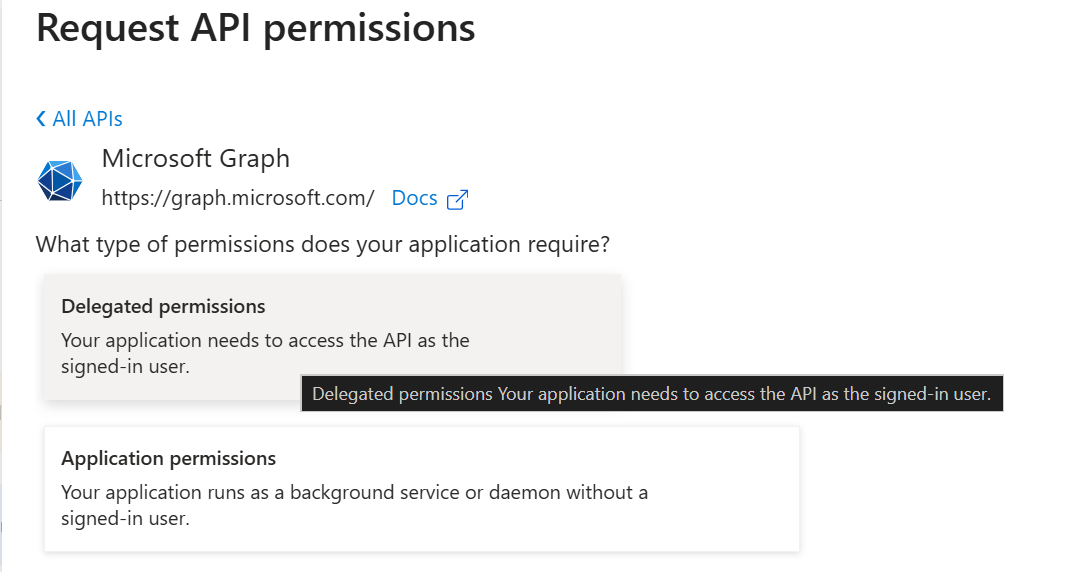
Step 7 — Grant Microsoft Graph API permissions
If you plan to use the OneDrive or Teams connectors, your app registration needs Microsoft Graph permissions on top of basic sign-in. Granting these requires admin rights in the Entra tenant.
In the app registration, click API permissions → + Add a permission, then pick Microsoft Graph.
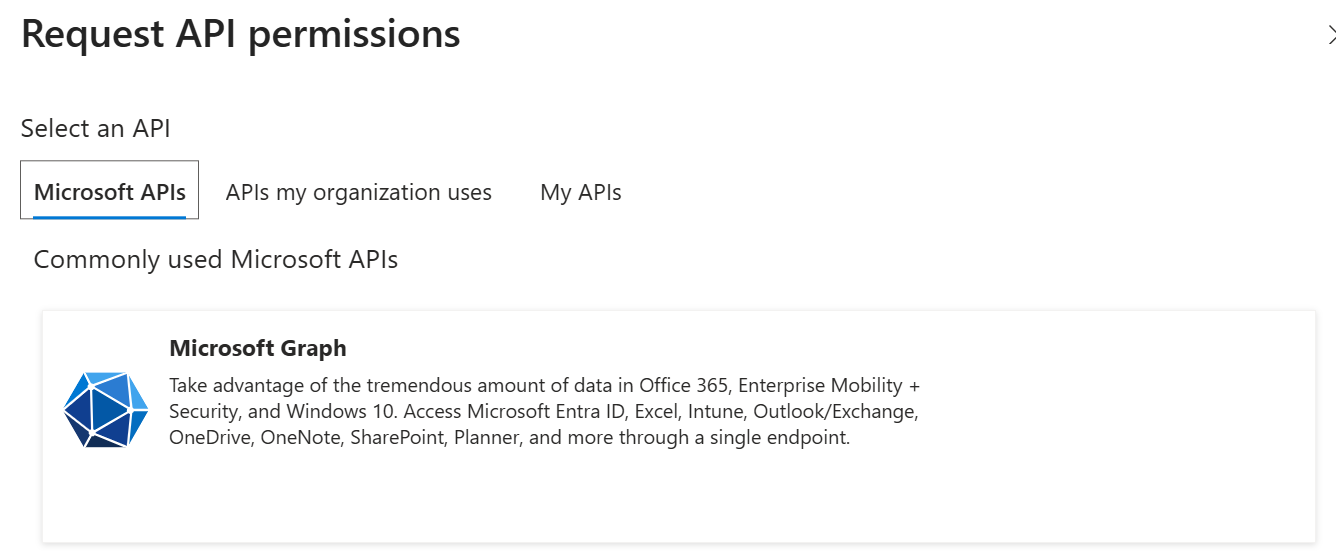
Pick Delegated permissions (the app calls Graph as the signed-in user, not as a daemon).
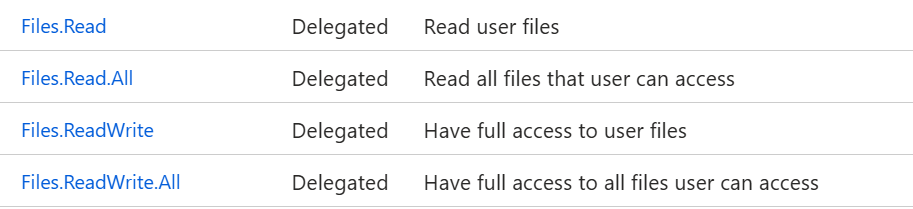
For OneDrive
Search for Files. and tick:
Files.Read— read user filesFiles.Read.All— read all files the user can accessFiles.ReadWrite— full access to the user's filesFiles.ReadWrite.All— full access to all files the user can access
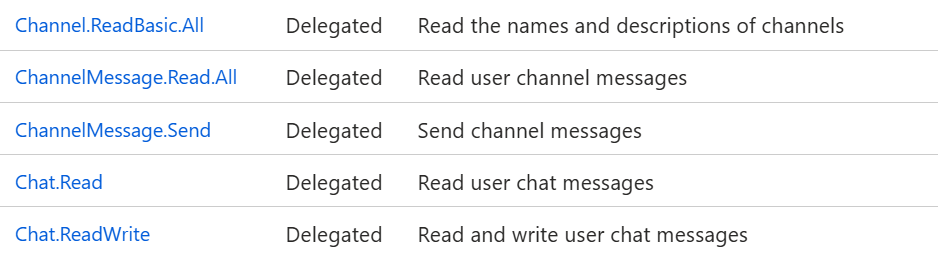
For Teams
Search for Chat., ChannelMessage., Channel., Team. and tick:
Chat.Read,Chat.ReadWrite— read and write the user's chat messages.ChannelMessage.Read.All— read user channel messages.ChannelMessage.Send— send channel messages on the user's behalf.Channel.ReadBasic.All— read the names and descriptions of channels.Team.ReadBasic.All— read the names and descriptions of teams.
Click Add permissions. If any of the permissions require admin consent, an admin will need to click Grant admin consent for <tenant> before users can sign in with them.
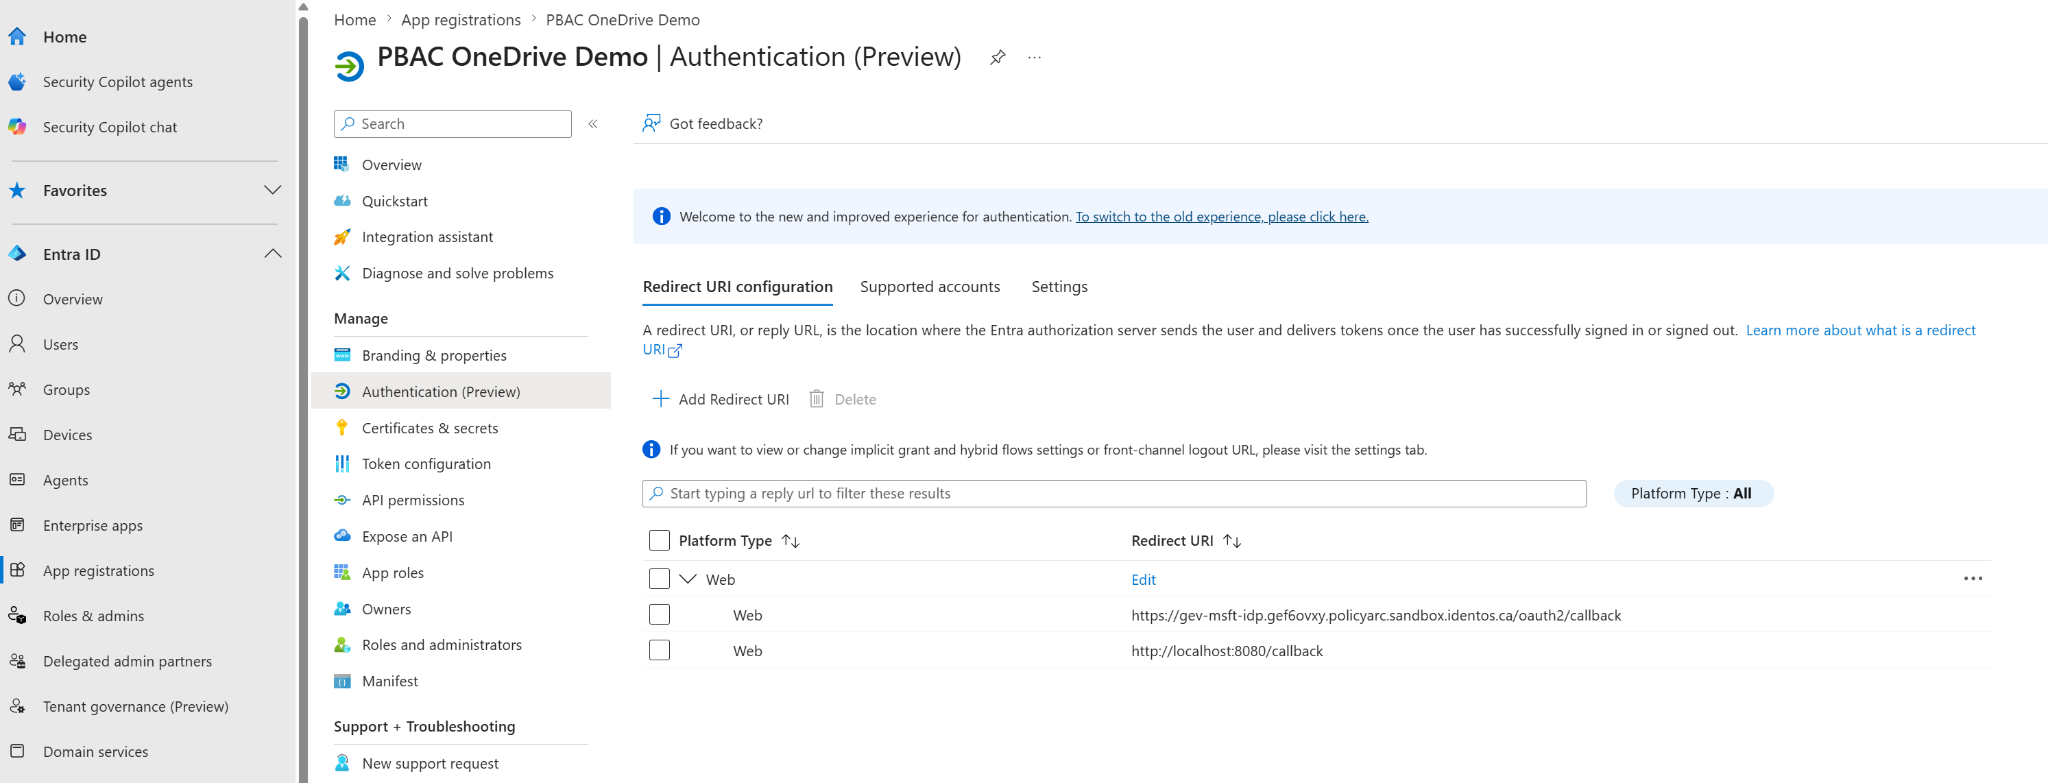
Editing the redirect URI later
If you ever need to change the callback URL (for example, you cut a new PolicyArc environment on a different port), open Authentication (Preview) in the app registration and edit the Redirect URI there. You can have more than one — it's safe to keep the old localhost callback alongside a new one.
What's next
Microsoft Entra is now authenticating users. Next, give them a resource to access:
- Microsoft OneDrive — file tools (list, read, upload, share) through Microsoft Graph.
- Microsoft Teams — chat and channel tools through Microsoft Graph.
- All resource connectors →